How to edit a dress design in ChatGPT without starting over
The short answer
To edit a dress design in ChatGPT, attach the version you want to keep and describe one specific change. List the important details that should remain, then compare the result with the original. Treat “keep everything else the same” as an instruction to check, not a guarantee that every detail will survive.
Perhaps you love the skirt but want sleeves. Perhaps the neckline is right but the colour is wrong. You do not need another completely different dress; you need a clearer version of this one.
The useful habit is to separate the design you have chosen from the variation you are testing.
Save a reference before making another change
Download or save your preferred image and give it a recognisable name, such as “dress-original” or “dress-short-sleeves”. Keep a short note beside it:
Example note
Keep: defined waist, full skirt, high neckline and below-knee length. Explore: a short sleeve. Not decided: fabric, fastening and final fit.
This note does two jobs. It protects the features you like, and it prevents an attractive image from silently becoming a finished specification.
If the image belongs to someone else, make sure you have permission to use it for the intended purpose. Do not ask the tool to reproduce another artist’s fabric artwork or add a brand label to a new design.
Ask for the edit, not a new interpretation of the whole dress
In a ChatGPT session with image editing available, attach the reference and state the change directly. Availability and usage limits depend on your account and settings; the prompt below is an example, not a tested recipe with a guaranteed result.
Edit the attached dress concept. Add simple short sleeves that finish above the elbow. Keep the existing neckline, waist position, skirt shape, dress length and colour as close to the reference as possible. Keep the same view and background so I can compare the designs. This is a visual concept; do not label it as a finished sewing pattern.
The details make the request easier to evaluate. If the new image also raises the waist or narrows the skirt, you can identify what changed instead of deciding only whether the result looks nice.
OpenAI’s image-generation guidance recommends targeted revisions and stating what should change and what should stay fixed. In clothing design, the comparison afterwards is just as important as the wording beforehand.
A real starting reference: the Tailored Crepe Dress
 Catalogue reference
Tailored Crepe Dress
Soft Crepe · $399 USD
MadeApt’s Tailored Crepe Dress provides a useful example: a sleeveless bodice, defined waist and full A-line skirt. Suppose you like that relationship between the waist and skirt but want more upper-arm coverage.
The design question is not simply “make this more modest”. It is: “What sleeve would give me the coverage I want while keeping this silhouette?”
An illustrative edit brief could be:
- Keep the existing neckline and defined waist.
- Keep the fullness of the skirt.
- Explore a plain short sleeve rather than a puff sleeve.
- Leave colour and skirt length unchanged during this comparison.
That is a proposed variation, not a claim that this exact version has already been made. A sleeve also needs to work with the armhole and allow movement. A convincing edited image does not confirm that the construction is resolved.
Check the areas you did not ask to change
Use this quick comparison before accepting a version:
| Area | What to compare |
|---|---|
| Neckline | Has its depth or shape changed? |
| Waist | Is it in the same position, with the same visual emphasis? |
| Skirt | Has the volume, silhouette or hem moved? |
| Details | Have pockets, buttons, seams or a belt appeared or disappeared? |
| Surface | Has the cloth become shinier, more transparent or more textured? |
A different pose or camera angle can make the same idea harder to judge. Where possible, compare like-for-like views rather than treating a more flattering presentation as a better design.
If something drifts, return to the saved reference rather than building every new edit on a version you already dislike.
Use the original image as the reference again. I want the original skirt fullness and waist position. Explore only the short sleeves. The narrower skirt in the last version is not part of my brief.
Keep colour changes separate from fabric decisions
For a colour comparison, a focused request might be:
Change the dress colour to deep green. Keep the design and the apparent surface finish close to the original. Do not add lace, embroidery or extra shine. Show the same view for comparison.
The result expresses a colour direction. It does not identify a fabric you can buy, establish the true shade in daylight or confirm how the cloth will move.
If you have a real fabric in mind, retain its supplier details separately. Our guide to visualising your own fabric on a clothing design covers the additional reference information that helps, and checking a fabric ChatGPT suggested covers the material itself.
A new back view is a proposal, not recovered information
If your original image only shows the front, asking for a back view creates a possible continuation of the design. It does not reveal a hidden, already-decided back.
Label it accordingly: “proposed back”. Check whether the neckline, waist and skirt seem compatible with the front. Record any fastening as a question for the maker unless it has actually been agreed.
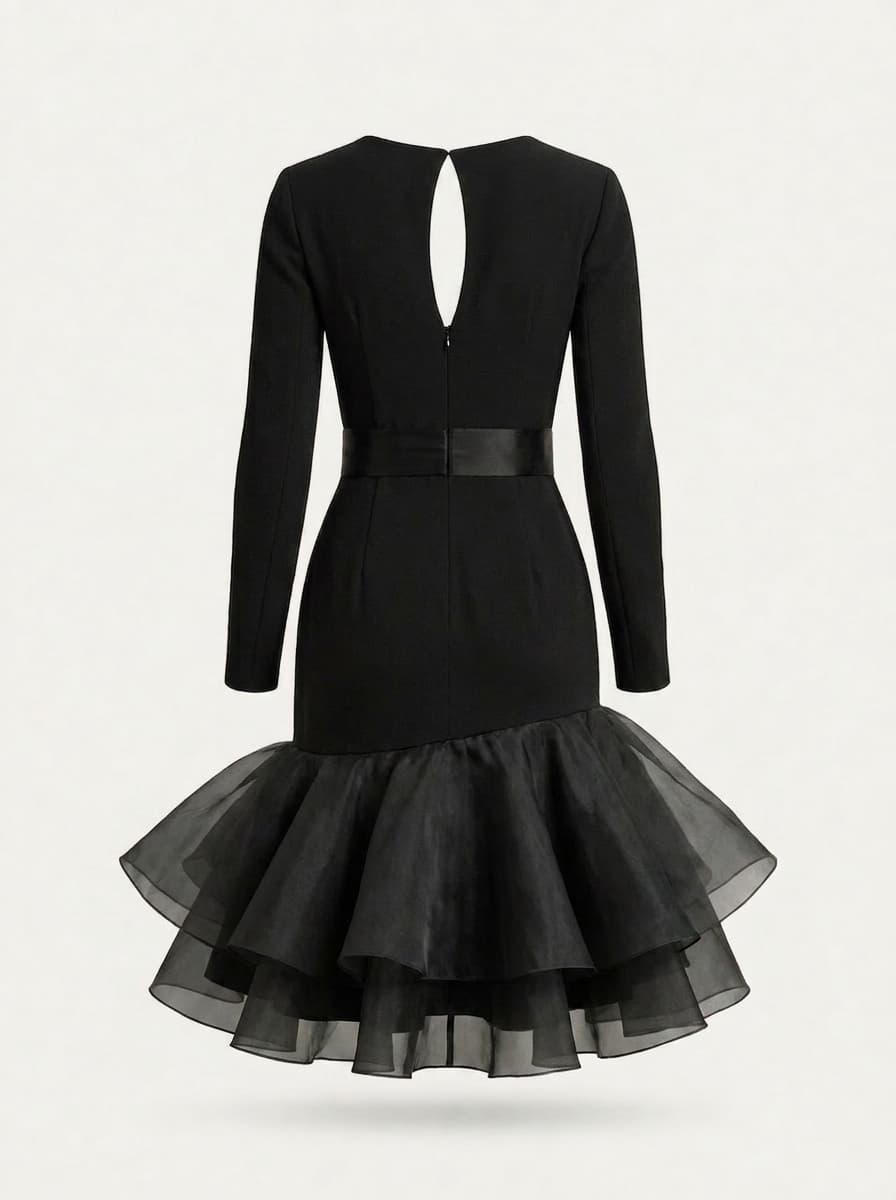
Proposed back 01 · keyhole
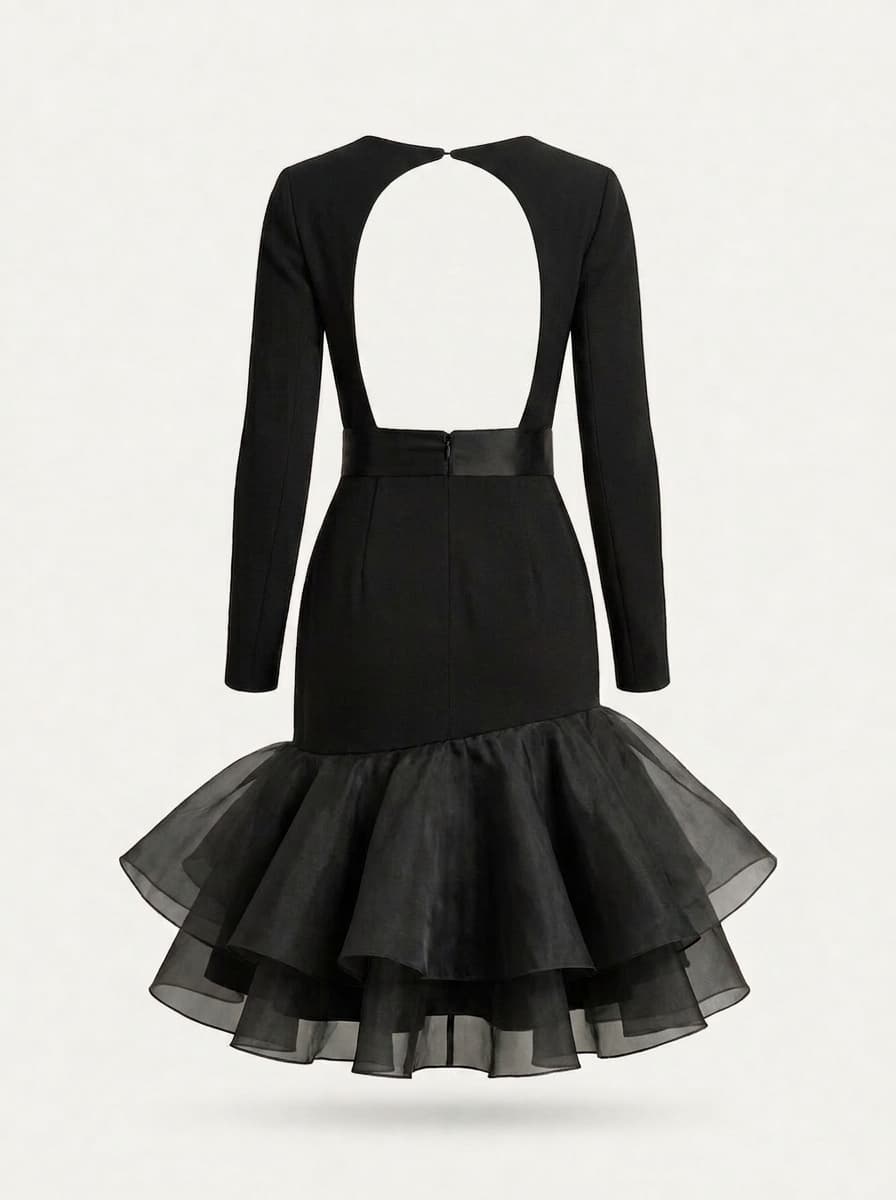
Proposed back 02 · open circle
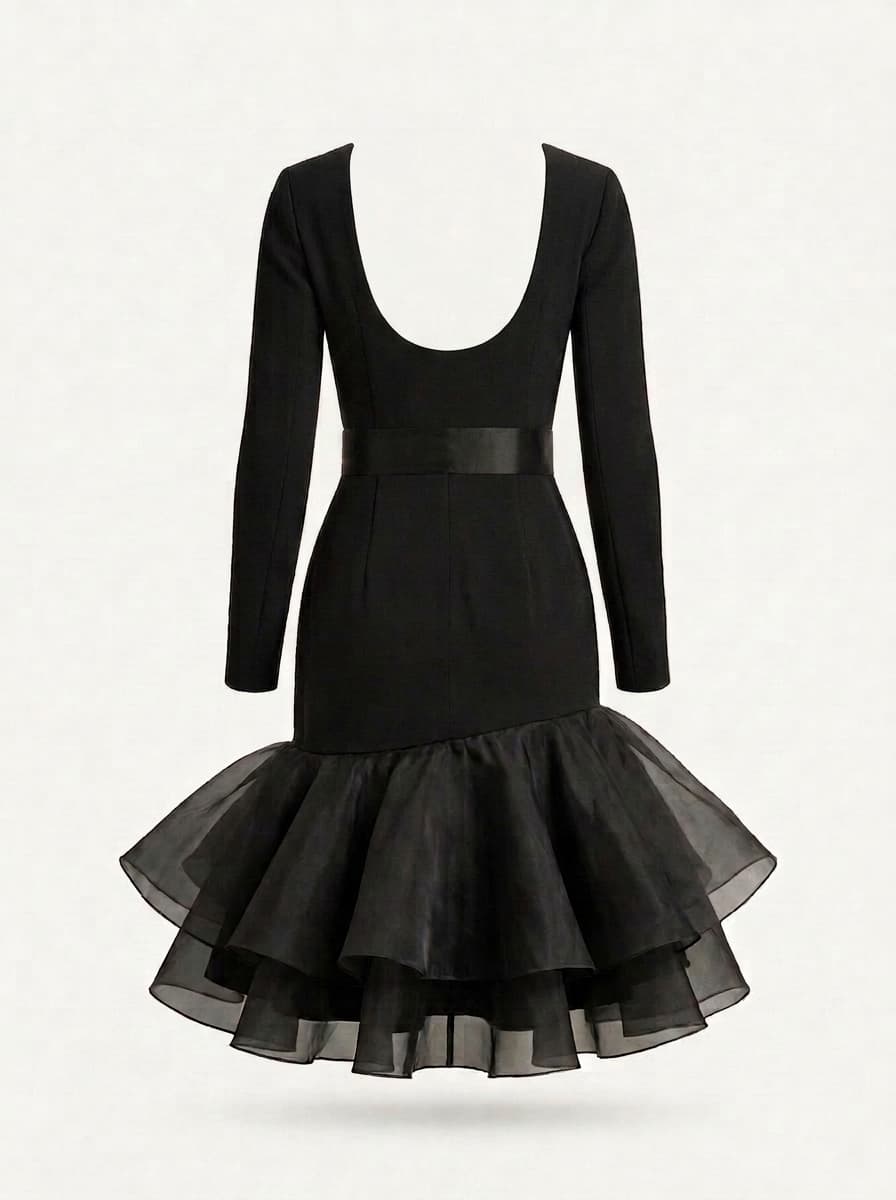
Proposed back 03 · scoop
It is fine to send a front image with a written question about the back. You do not need to generate ten more pictures to make an enquiry feel legitimate.
Finish with one preferred version and a short change list
Before requesting a quote, choose the clearest version and write down what you approved. If you like the front of one image and the sleeves of another, identify those parts explicitly rather than asking the maker to guess.
For example:
Example change list
Preferred design: image A. Use the short-sleeve direction from image B, but retain image A’s neckline, waist and skirt. Deep green is a colour preference, not a confirmed fabric. Please advise on the back, fastening and any changes needed for comfortable movement.
Keep old versions for your own reference, but do not present all of them as equally final.
Can I continue in MadeApt after starting in ChatGPT?
You can bring the chosen reference into the MadeApt Studio to continue exploring your idea. Include the change list as well as the picture, so the next step starts from your decisions rather than another vague redesign.
You do not need ChatGPT to make a first concept: you can also start directly in MadeApt. Check the current in-app options and any credit charges before using paid features.
When you are ready to discuss having the garment made, follow the ChatGPT design-to-dress guide. The important handoff is one design you understand, not the largest possible collection of images.
Related guides
chatgpt designed my dress. how do i get it made?
The handoff from one chosen image to a tailor’s quote: what ChatGPT gets wrong for production and how each is fixed.
chatgpt suggested a fabric for my dress. how do i check it?
Fibre versus weave, the evidence to collect about the actual cloth, and what to send with the suggestion.
is chatgpt good enough to design a real dress?
What a render gives a tailor and what it doesn’t, before you treat an image as a decision.
how to visualise your own fabric on a clothing design
Previewing a real cloth on a design, and the reference information that makes the preview useful.
One design you understand beats ten you half like.
Bring the reference you chose and your change list. The next step starts from your decisions, not from another redesign.